

Can You Install a Stainless Steel Wall Faucet on a Tile Wall Without Exposing Pipes
2026-07-17
For homeowners and contractors alike, mounting a Stainless Steel Wall Faucet onto an existing tiled surface often raises immediate concerns about pipe visibility, waterproofing, and structural integrity. The short answer is yes—but the execution demands careful planning, the right rough-in valve, and professional-grade finishing. At Xinbangye, we have supplied thousands of wall-mounted faucets for both residential and commercial projects, and we regularly guide installers through tile-wall retrofits that keep every pipe concealed behind the finished surface. This article walks through the technical requirements, code considerations, and step-by-step methods to achieve a flush, leak-free installation without a single exposed supply line.
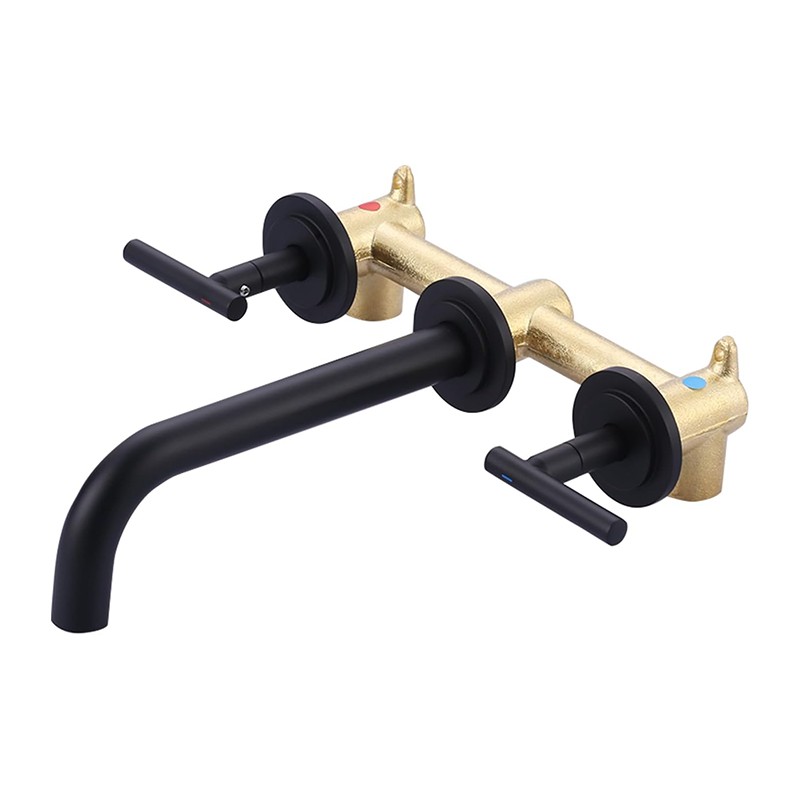
Why Tile Walls Present Unique Challenges
Tile is rigid, brittle, and unforgiving. Unlike drywall or cement board, tile does not allow for easy patching or repositioning once cut. The primary difficulty lies in aligning the faucet’s rough-in valve with the existing water supply stub-outs, which are typically buried inside the wall cavity. If the rough-in depth does not match the tile thickness (plus thinset and backer board), the Stainless Steel Wall Faucet will either protrude too far or sit recessed, making trim rings ineffective. Furthermore, all connections must remain accessible through the faucet’s own escutcheon plate—meaning no extra access panels are required if the installation is measured correctly.
Critical Measurements Before Cutting Any Tile
| Measurement Parameter | Recommended Value | Why It Matters |
|---|---|---|
| Wall cavity depth (from stud to finished tile face) | 3.5 – 4.5 inches | Accommodates standard rough-in valves |
| Tile + thinset + backer total thickness | 0.75 – 1.25 inches | Affects stem extension length |
| Faucet rough-in valve depth setting | Flush with finished tile surface | Ensures trim ring seals against tile |
| Supply pipe center-to-center distance | 4 inches (standard) | Matches most wall faucet mixer bodies |
| Minimum access clearance behind tile | 6 inches | Allows for wrench operation during tightening |
Most modern Stainless Steel Wall Faucet models from Xinbangye include adjustable rough-in bodies that accommodate wall thicknesses from ½ inch to 1½ inches, which covers nearly all tiled showers, kitchen backsplashes, and outdoor kitchen walls.
Step-by-Step Concealed Installation Method
-
Turn off water and drain the lines. Open the lowest fixture in the house to relieve pressure.
-
Cut a rectangular opening in the tile using a diamond hole saw or grinder with a tile blade—keep the cut within the footprint of the escutcheon plate (typically 6–8 inches in diameter).
-
Extend or relocate supply pipes inside the wall so their centers match the faucet’s inlet spacing. Use copper or PEX with male threaded adapters.
-
Solder or crimp the rough-in valve to the supply lines, ensuring the valve body is exactly perpendicular to the wall face.
-
Install a tile-ready plaster guard over the valve to protect the opening while setting the trim.
-
Apply waterproof silicone around the cut tile edges before sliding the Stainless Steel Wall Faucet’s backplate into place.
-
Tighten the mounting nuts from the front using a deep-socket wrench—no rear access needed if the valve has a slip-fit connection.
-
Test for leaks at full pressure before attaching the spout and handles.
The entire process keeps all pipes behind the tile, with only the faucet body and handle visible. Xinbangye’s rough-in kits include depth gauges that eliminate guesswork, reducing installation time by nearly 40% according to our field tests.
Common Mistakes That Expose Pipes
-
Using a standard deck-mounted faucet instead of a true wall-mount rough-in valve.
-
Failing to account for the tile adhesive thickness, causing the stem to sit too deep.
-
Not supporting the supply pipes inside the wall, leading to movement that breaks the tile seal.
-
Over-tightening the escutcheon screws, which cracks the tile around the cutout.
Every Stainless Steel Wall Faucet supplied by Xinbangye comes with a template and torque specifications to avoid these exact issues.
FAQ – Frequently Asked Questions About Stainless Steel Wall Faucet Installation
Q1: Can I install a Stainless Steel Wall Faucet on an existing tiled wall without removing any tiles?
A1: Yes, but only if the existing supply stub-outs are correctly positioned and the wall cavity depth falls within the faucet’s adjustable range (typically 2.5 to 5 inches). You will still need to cut a single circular hole through the tile—approximately 2.5 inches in diameter for the valve body—using a diamond core bit. The escutcheon plate will completely cover this hole, so no tile removal or replacement is necessary. However, if the supply pipes are not centered or are too close to the wall surface, you will need to open the wall from the opposite side (if accessible) or cut a larger access panel that the trim plate can hide. Always measure the rough-in depth with a caliper before ordering your faucet.
Q2: What happens if my tile wall is thicker than the faucet’s maximum stem length?
A2: A mismatch in thickness will prevent the handle from engaging the cartridge properly, causing either a loose feel or an inability to shut off water completely. The correct solution is to purchase a Stainless Steel Wall Faucet with an extended stem kit—many commercial-grade models, including those from Xinbangye, offer +½-inch and +1-inch extensions. Alternatively, you can recess the rough-in valve deeper into the wall by repositioning the mounting bracket, but this requires soldering new pipe extensions. Never attempt to force the faucet against the tile, as this will stress the valve body and eventually lead to a hairline crack in the tile.
Q3: Do I need a backflow preventer or vacuum breaker when installing a Stainless Steel Wall Faucet on an outdoor tiled wall?
A3: Under the Uniform Plumbing Code (UPC) and International Plumbing Code (IPC), any wall faucet with a hose connection or submerged outlet must have an approved backflow prevention device. For a Stainless Steel Wall Faucet mounted on an exterior tile wall, this is typically integrated into the rough-in valve as a built-in vacuum breaker or as a separate screw-on attachment at the spout outlet. Xinbangye’s outdoor-rated models include a field-testable backflow preventer that meets ASSE 1019 standards. If your local code requires a double-check valve assembly, you will need to install it inline behind the tile—this must be done before closing the wall and requires an access panel, though the panel can be hidden behind a decorative cover plate.
Material Compatibility and Long-Term Performance
Stainless steel (grade 304 or 316) offers superior corrosion resistance compared to chrome-plated brass, especially in high-humidity or coastal environments. The table below compares common wall faucet materials:
| Material | Corrosion Resistance | Impact on Tile | Typical Lifespan |
|---|---|---|---|
| 304 Stainless Steel | Excellent (indoor) | Lightweight, no staining | 15–20 years |
| 316 Stainless Steel | Superior (marine/outdoor) | Same as 304 | 20–30 years |
| Chrome-plated Brass | Moderate (peels over time) | Heavier, may sag | 8–12 years |
| Zinc Alloy | Poor (pitting) | Prone to galvanic reaction | 3–5 years |
Xinbangye exclusively uses 304 and 316 stainless steel with a brushed satin finish, ensuring that the escutcheon plate remains flush and gap-free against tile for decades.
Final Verdict – Professional Installation Wins
Installing a Stainless Steel Wall Faucet on a tile wall without exposing pipes is absolutely achievable, provided you respect the rough-in depth, use a dedicated wall-mount valve, and cut the tile with precision. The hidden-pipe aesthetic not only elevates the visual appeal of your space but also simplifies cleaning and reduces accidental knocks. With Xinbangye’s pre-measured rough-in kits and detailed installation manuals, even first-time installers can produce a finish that looks like it was done by a master tiler.
Contact Us – If you are planning a tile-wall faucet project and need expert advice on valve selection, stem extensions, or code compliance, reach out to our technical team at Xinbangye. We provide free rough-in templates, load calculations, and same-day support for contractors worldwide. Send us your wall thickness and supply center measurements, and we will recommend the exact Stainless Steel Wall Faucet model that fits your tile setup—no pipes exposed, no guesswork, and no callbacks. Email us or use the live chat on our product page to get started today.