

What Is the Best Way to Mount a Bathroom Stainless Steel Single Tumbler Brush Holder on Tile
2026-07-10
Mounting a Bathroom Stainless Steel Single Tumbler Brush Holder on ceramic or porcelain tile can feel intimidating, but with the right approach, it becomes a straightforward fifteen‑minute project. Whether you are upgrading your master ensuite or fitting out a guest powder room, the durability and sleek finish of a Bathroom Stainless Steel Single Tumbler Brush Holder from Qishi make it a popular choice. However, tile presents unique challenges: hard surfaces, potential cracking, and the need for a watertight seal. This guide walks through professional methods, tool selections, and common pitfalls, so your holder stays secure for years.
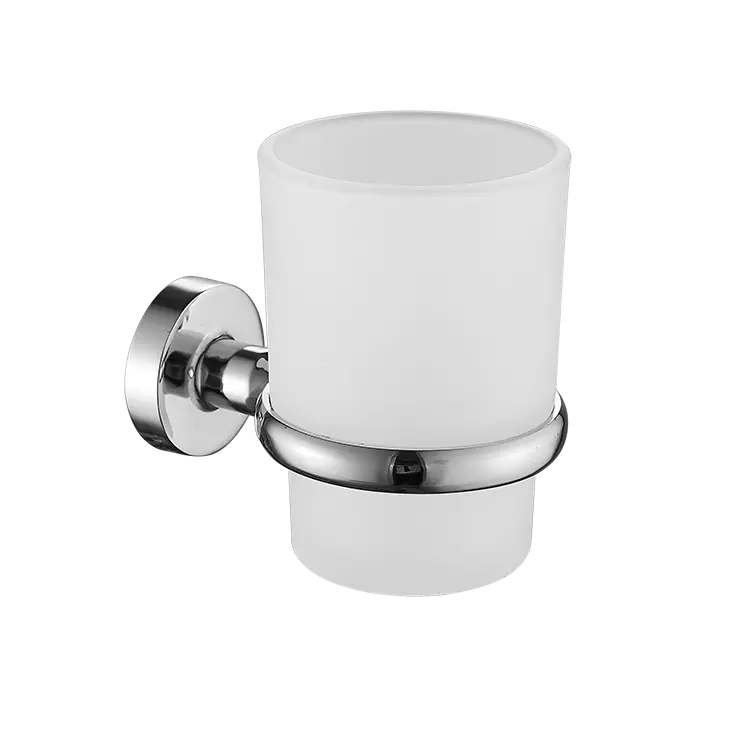
1. Choosing the Right Mounting Method for Tile
Not all tile installations are equal. The best technique depends on your tile type (glazed, natural stone, or glass), the weight of your Bathroom Stainless Steel Single Tumbler Brush Holder, and whether you can access the wall cavity behind.
| Tile Type | Recommended Method | Adhesive / Fastener | Drill Bit Required |
|---|---|---|---|
| Glazed ceramic / porcelain | Drill + wall plug + screw | Stainless steel screw + silicone seal | Diamond-tipped or carbide masonry bit |
| Natural stone (marble, travertine) | Drill + rubber anchor + screw | Epoxy adhesive + plastic anchor | Diamond core bit with water cooling |
| Glass tile | Adhesive‑only (no drill) | High‑bond VHB tape or clear epoxy | Not applicable (drilling not recommended) |
| Large‑format porcelain (>12 mm thick) | Drill + expansion bolt | Stainless bolt + washer | SDS‑plus masonry drill with guide |
For most residential bathrooms, Qishi recommends the drill‑and‑plug method because it provides the strongest mechanical hold, especially when the holder will support a heavy tumbler filled with water and multiple brushes.
2. Step‑by‑Step Professional Mounting Procedure
Following this sequence minimises tile damage and ensures a level, rattle‑free fit for your Bathroom Stainless Steel Single Tumbler Brush Holder.
-
Mark accurately – Use a spirit level and a pencil to mark the centre point of the screw hole. Tape a piece of painter’s tape over the mark to prevent the drill bit from slipping.
-
Select the correct bit – For glazed tile, always use a diamond‑tipped spear bit or a carbide‑tipped masonry bit at low speed (under 800 RPM). Apply light pressure and let the bit do the work.
-
Drill a pilot hole – Start with a 3 mm bit, then enlarge to the size recommended by your wall plug (usually 6 mm for a standard #8 screw). Stop immediately if you feel the bit bind – that indicates you have hit the concrete or stud behind.
-
Clean the hole – Blow out dust and insert the wall plug until it is flush with the tile surface.
-
Apply waterproof sealant – Run a small bead of clear silicone inside the hole and around the plug. This prevents moisture from seeping behind the tile – a critical step for any Bathroom Stainless Steel Single Tumbler Brush Holder.
-
Drive the screw – Hand‑tighten the screw until the holder’s mounting bracket is firm but not over‑torqued. Over‑tightening can crack the tile.
-
Attach the holder – Slide the Bathroom Stainless Steel Single Tumbler Brush Holder onto the bracket and secure the set screw (if provided). Verify level one final time.
Pro tip from Qishi: If your tile is extremely hard (e.g., full‑body porcelain), use a coolant gel or a spray bottle with water to keep the bit cool – this doubles bit life and prevents thermal shock to the tile.
3. Adhesive‑Only Alternative – When and How
Drilling is not always possible – rental properties, glass tiles, or thin mosaic sheets call for a no‑drill solution. In these cases, Qishi suggests using industrial‑grade double‑sided foam tape (3M VHB or equivalent) combined with a clear epoxy dab at the centre.
-
Clean the tile and the backplate of your Bathroom Stainless Steel Single Tumbler Brush Holder with isopropyl alcohol.
-
Apply tape strips along the full perimeter and one epoxy drop in the middle.
-
Press firmly for 60 seconds, then do not load the holder for 24 hours.
This method supports up to 5 kg of static weight – ample for a single tumbler and two brushes. However, always check the adhesive’s temperature rating; bathrooms with under‑floor heating can soften standard tapes.
4. Common Mistakes to Avoid
-
Using a hammer drill on glazed tile – Always use rotary mode only; hammer action shatters glaze.
-
Skipping the wall plug – Screwing directly into tile offers poor pull‑out strength. Always use a nylon or metal plug.
-
Ignoring the stud – If you hit a wooden stud behind the tile, you can screw directly into it without a plug – but pre‑drill with a wood bit to avoid splitting.
5. Bathroom Stainless Steel Single Tumbler Holders – FAQ
Q1: Can I mount a Bathroom Stainless Steel Single Tumbler Holder on textured or uneven tile?
A1: Yes, but you must use a universal mounting bracket with adjustable depth – available from Qishi for most of our holders. Textured tiles (e.g., slate or riven finish) create an uneven back surface. To compensate, apply a thick bead of hybrid polymer adhesive (not regular silicone) to the backplate, press it against the tile, and hold it with painter’s tape for 12 hours. The adhesive cures to fill gaps up to 3 mm. For mechanical fixing, use a cone‑shaped wall plug that expands radially – these grip better in uneven holes. Always test the stability by gently tugging the holder before placing any tumbler inside.
Q2: How do I remove a Bathroom Stainless Steel Single Tumbler Holder from tile without damaging the surface?
A2: Removal depends on the mounting method. For screw‑mounted holders, simply unscrew the fastener, then fill the hole with colour‑matched tile filler or a small silicone plug. For adhesive‑mounted holders, slide a thin steel wire or dental floss behind the backplate in a sawing motion to cut through the foam tape. For epoxy residue, warm the area with a hairdryer (low heat) for 2 minutes, then gently scrape with a plastic razor blade. Never use a metal scraper – it scratches the glaze. If the hole was sealed with silicone, apply a silicone solvent and twist the plug out with pliers. Qishi includes a removal guide with every holder, ensuring you can update your bathroom without permanent marks.
Q3: Will my Bathroom Stainless Steel Single Tumbler Holder stay secure if mounted over a tile joint (grout line)?
A3: Mounting directly over a grout line is not advised because grout is soft and crumbles over time. If your layout forces this placement, Qishi recommends one of two solutions: (1) Use a bridge plate – a wider stainless steel backplate that spans across the grout line and fixes into solid tile on both sides. (2) Drill into the grout itself, but fill the hole with epoxy resin first, let it cure, then drill a smaller pilot hole through the resin and insert a wall plug. This creates a composite anchor that is stronger than grout alone. However, the load capacity drops by about 40% compared to a solid‑tile mount, so only use this for lightweight tumblers (under 1.5 kg). For daily family use, reposition the holder by 3–5 cm to avoid the grout line entirely – a small shift saves future frustration.
6. Maintenance After Mounting
Once your Bathroom Stainless Steel Single Tumbler Brush Holder is securely in place, maintain its mirror finish with a soft cloth and mild soap. Avoid abrasive pads – they scratch the protective oxide layer. Qishi holders feature an 18/10 grade stainless steel, which resists corrosion even in steamy bathrooms, but wiping down the backplate weekly prevents soap scum build‑up around the seal.
Final Checklist Before You Drill
-
Tile type identified and bit selected
-
Power drill set to rotary (not hammer)
-
Painter’s tape applied over mark
-
Wall plug and screw match hole size
-
Silicone sealant ready for waterproofing
-
Level confirmed in both directions
A correctly mounted Bathroom Stainless Steel Single Tumbler Brush Holder enhances both function and style – it keeps countertops clutter‑free and adds a hotel‑quality touch to your daily routine. Qishi designs every holder with precision‑machined brackets and anti‑loosening screws, so your installation remains rock‑solid even with repeated use.
Contact Us – Have a tricky tile layout or need a custom bracket size? The Qishi support team is ready to help with free mounting advice and product recommendations. Reach out via our website contact form or email us directly – we respond within 24 hours with tailored solutions for your bathroom project. Let us make your installation effortless, from the first mark to the final polish.